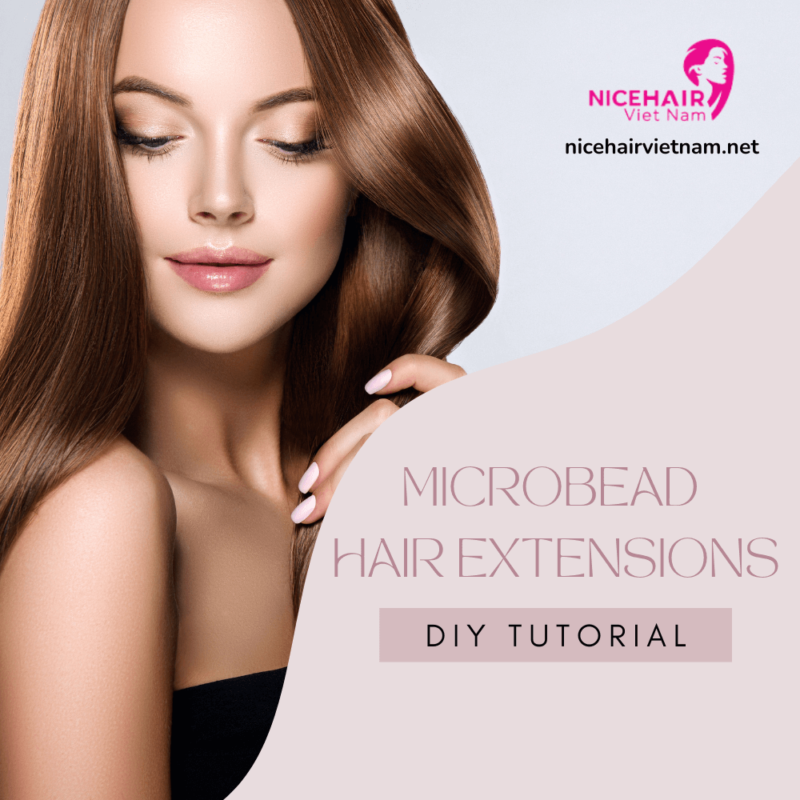
Welcome to our DIY microbead hair extension tutorial! If you’ve been longing for longer, fuller, and more voluminous hair, microbead hair extensions are a fantastic option to consider. In this tutorial, we will guide you through the step-by-step process of applying microbead hair extensions at home, allowing you to achieve your desired hair transformation without the need for a salon visit.
What is microbead hair extensions tutorial?
Before we get to know further about the tutorial, having a foundation knowledge about microbead hair extension is really important. Then, let’s go through each components below!
Microbeads hair extensions
Microbead hair extensions (also known as I-tip hair extensions, micro ring or micro loop hair extensions) are hair extensions attached to small, discreet beads. They are visible but blend well, providing added length and volume to the hair. They are ideal for individuals with thin or non-voluminous hair who desire a bouncy look. On the other hand, another type of hair extensions that requires application with tools just like microbead hair extensions is clip-in extensions which requires different application methods using clips. In a nutshell, the distinction between the two, as beads and clips serve different purposes. The similarity between microbead and clip-in extensions lies in their diversity, offering options like colored extensions and various hair textures such as straight, curly, and wavy styles. However, in this reading, we will pay attention to only microbead hair extensions and its tutorial which will be illustrated below.
Microbead hair extensions tutorial
A microbead hair extensions tutorial provides step-by-step instructions on utilizing this specific type of hair extension. It covers essential aspects such as the application, removal, in a version of do-it-yourself (DIY) techniques to create a personalized and unique hair extension experience. In this article, we will guide you through the process of applying microbead hair extensions and how to remove them, offering you the fundamental knowledge required to make the most of these extensions. But before going into details about these steps, we should first get to know the preparation for a successful DIY microbead hair extension that follows.
Preparation
Material
The first crucial step is selecting the right products with high quality and choosing your desired length, ranging up to 30 inches, as well as the weight, color, and texture options, from straight to curly. Next, search for appropriate accessories, including combs, brushes, clips, micro rings, beads, and special pliers for your micro loop hair extensions. It is convenient to order all your beauty essentials together so that you can begin your hair transformation immediately upon delivery.
Remember, making mistakes or encountering challenges is part of the learning process. Don’t worry if you mess up initially, as with a few adjustments, you’ll quickly master the art of installing micro-loops for yourself or your friends. Embrace the learning journey and soon you’ll be confidently installing micro-loops in no time.
Estimated time
The estimated time for applying microbead hair extensions can vary depending on various factors, including the experience level of the person applying them, the number of extensions being installed, and the desired outcome. On average, the application process for microbead hair extensions can take anywhere from 1 to 3 hours. And the time can be longer for beginners or those who are new to the process, as they may need more time to familiarize themselves with the technique and ensure a proper application. With experience, the application time can become more efficient.
Additionally, if you are planning to apply a large number of microbead hair extensions or if you are working with a complex hairstyle, it may take longer to complete the process.
Process
- Make sure your hair is dry and smooth
It is advisable not to apply human hair extensions when your hair is wet, as this can lead to the extensions falling or slipping out once you go about your day. Therefore, after shampooing and conditioning your hair, it is best to work with dry hair during the application process to ensure a more secure attachment. Prior to applying the extensions, ensure that your hair is free from any damage or issues.
Before starting the application, take the time to gently brush your hair backward, being cautious to avoid any tangles. You can use a comb or your hands to carefully comb through your hair, ensuring a smoother texture that will facilitate the extension application process.
- Pin hair to prepare to apply
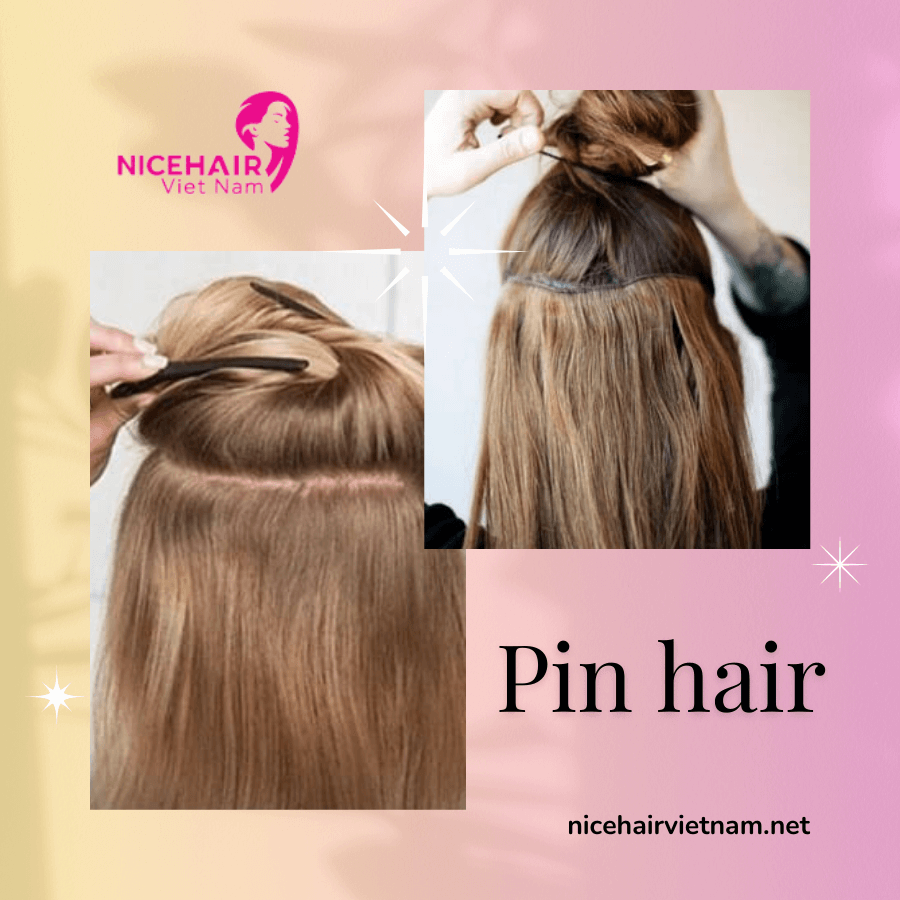
Moving on to the following step of the microbead hair extensions tutorial, it is recommended to apply the extensions in the middle section of your hair rather than starting at the top. To do this, securely clip up the top layer of your hair using pins or clips, ensuring it stays in place and doesn’t fall down. This technique is similar to the installation process for tape-in hair extensions and many other types of extensions.
Next, take a small section of your hair in your hand and estimate that it is approximately the same width as the hair extension you are planning to apply. This helps ensure that the extensions blend seamlessly with your natural hair, preventing them from being overly exposed or appearing fake. By matching the width of the extension to the section of your hair, you can achieve a more natural and seamless look.
- Install micro bead

To ensure a smooth and efficient application process, it is recommended to have a loop tool on hand. With the loop tool in hand, place your middle finger firmly on your hair and insert it through the loop of the hair extension. Then, gently push the microbead up towards the top of your hair, ensuring a secure attachment.
Once the microbead is in position, it is important to hold onto the hair that is attached to the bead, ensuring it does not loosen or fall out. This step helps to maintain the stability and longevity of the extension. By securing the hair with a firm grip, you are one step closer to completing the application process.
With the microbead securely in place and the hair extension attached, you are nearly finished with the application. Take a moment to ensure that everything feels secure and comfortable before moving on to any additional extensions or completing the styling process.
- Thread extensions into your real hair
In the next stage of the microbead hair extensions tutorial, it is time to thread the extensions into your real hair. Carefully remove the extensions from the microbead hair extensions package and insert them into the hair section that already contains the bead you are holding. Take your time to ensure that the extensions are aligned and properly integrated into your natural hair.
To secure the extensions firmly, use a clipper or hair clip to hold them in place. It is recommended to clip the extensions 2 to 3 times for maximum stability. Start by clipping once in the middle, ensuring that the bead, hair extensions, and your real hair are tightly secured together. Then, clip on the sides to further reinforce the attachment. This step guarantees that the extensions remain in place, providing a comfortable and secure fit.
- Adjust micro bead hair extensions
To extend the lifespan of your micro strip hair extensions, a few simple steps can make a significant difference. By adjusting them on a monthly basis, you can keep your lengthened and fuller mane looking fabulous for longer periods. Start by parting your back locks just above the first row of AiryHair extensions. Pin your upper tresses securely over your head to keep them out of the way.
Now, take the first section of the extension below the clamped bead. Using a pair of pliers, press them against the outer sides of the flattened ring, gently turning it back into an open circle. This will allow you to remove the strip from your hair. Slide the strip and ring higher up your hair shaft, making sure to stop when it is about one-half inch away from your scalp.
Next, press the added strands inside the bead until their ends align with the top edge of the bead. This will ensure a seamless blend between your natural hair and the extensions. Once in place, use the pliers to crimp the middle of the ring, as well as both ends, firmly. This will create a secure hold and prevent the extensions from slipping or coming loose. Repeat these steps for all the remaining sections and rows of your micro strip hair extensions.
By following these instructions diligently, you can maintain the longevity of your micro strip hair extensions and enjoy their beautiful appearance for an extended period. Remember to make these adjustments on a monthly basis to keep your hair looking fresh and voluminous. With proper care and maintenance, your micro strip hair extensions will continue to enhance your hairstyle and boost your confidence.
- Remove hair extensions
The first step of this much simpler stage that you can do it yourself is to loosen the bead. Using the same crimper you used during the installation, place it between the ends of the bead to gently loosen it. This will release the hold on the hair and hair extensions. Once the bead is loosened, carefully hold it with your hands.With the bead and extensions now loose, allow them to fall naturally and then place them on a table or a safe surface. This marks the completion of the removal process. It’s important to handle the extensions with care to avoid any damage or tangling.
After removing the extensions, it is recommended to wash both the bead and the hair extensions. This will help remove any dirt or product buildup and ensure that they remain clean and shiny for future use. Proper maintenance and cleaning of the extensions will contribute to their longevity and overall appearance.Remember, when handling and caring for your micro bead hair extensions, always be gentle and take your time to ensure their proper removal and cleaning. By following these steps, you can maintain the quality and beauty of your extensions, allowing you to enjoy them for an extended period.
What other things you might be interested to know about applying microbead hair extensions by yourself?
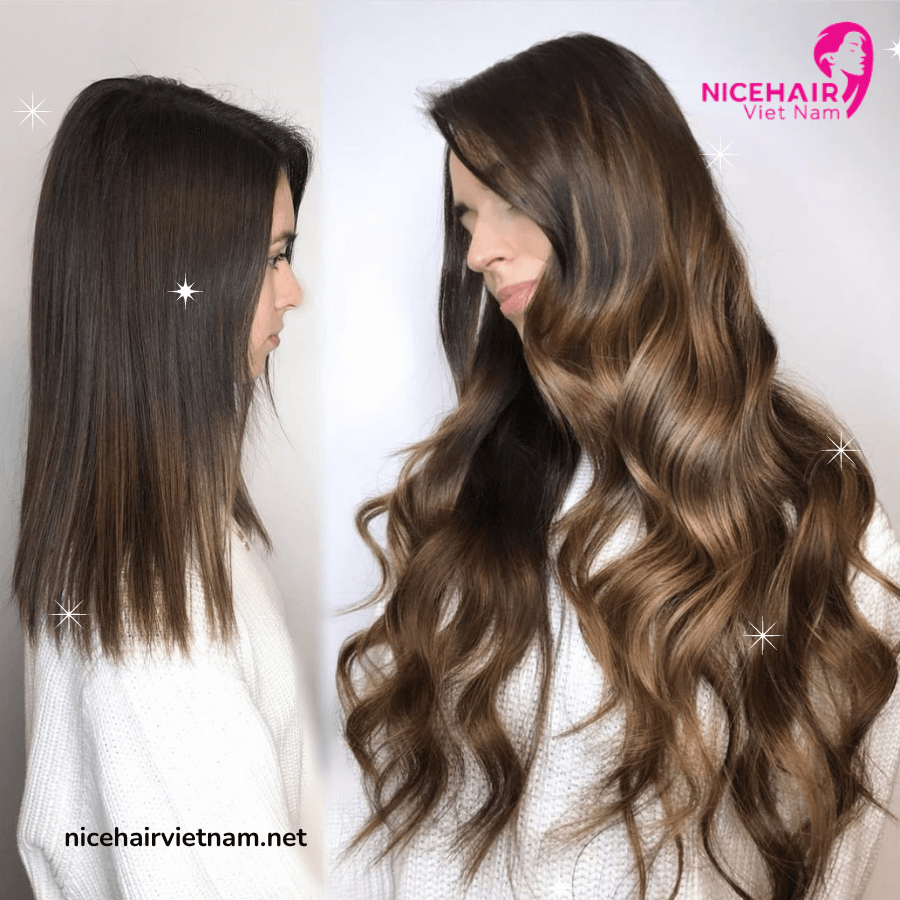
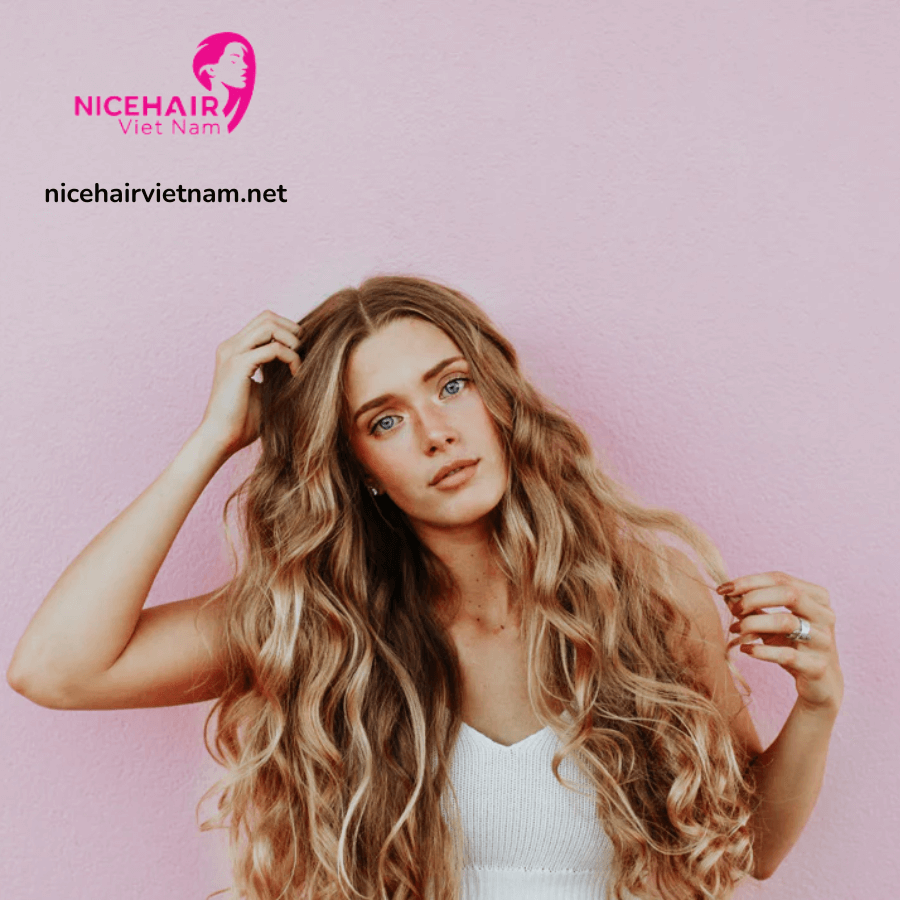
After applying microbead hair extensions, the results are stunning and can completely transform your appearance. The extensions seamlessly blend with your natural hair, creating a long, voluminous, or maybe add more texture and color. But in general, now, your hair is unlocked with a versatile styling and luscious look, which definitely boosts your confidence.
Benefits of applying it by yourself
- Cost savings: One of the primary advantages of self-application is the potential cost savings. By eliminating the need for professional application, you can save money on salon fees or stylist appointments. This makes self-applying microbead extensions a more budget-friendly option for those who are comfortable with the process.
- Convenience and flexibility: Self-application allows you to have more control over when and where you apply the extensions. You can work at your own pace and schedule, without having to rely on salon appointments or limited availability, which makes it a time-saving option when you have the necessary skills and experience, self-applying microbead hair extensions. This flexibility can be particularly beneficial for individuals with busy lifestyles or unpredictable schedules. There you can now apply the extensions at your own convenience, whether it’s during the day or evening.
- Customization: Self-applying microbead hair extensions gives you the opportunity to customize your look to your preferences. You can choose the length, color, and texture of the extensions that best suit your desired style. This allows for a more personalized and tailored hair transformation that aligns with your unique vision.
- Learning experience: Self-application provides an opportunity to learn and develop new skills. By researching and practicing the process, you can gain a better understanding of hair extensions and enhance your hairstyling abilities. This knowledge can be beneficial for future styling endeavors or even assisting others with their hair extensions.
- Privacy and comfort: Some individuals may prefer to maintain their privacy and prefer to handle their hair extensions in the comfort of their own space. Self-application allows for a more private and intimate experience without the need for additional people involved in the process.
- Experimentation: Self-applying microbead hair extensions gives you the freedom to experiment with different styles, lengths, and colors. You can easily switch up your look and try out new trends without relying on a stylist. This experimentation can be fun and exciting, allowing you to discover new looks that suit your personality and preferences.
- Reusability: When you self-apply microbead hair extensions, you have the advantage of being able to reuse them multiple times. By carefully removing and properly storing the extensions, you can enjoy multiple applications without the need to purchase new ones. This can be cost-effective in the long run and give you the flexibility to switch up your look whenever you desire.
- Flexibility for touch-ups: With self-applied microbead hair extensions, you have the flexibility to perform touch-ups or make adjustments as needed. If you notice any loose extensions or desire a different style, you can easily address these issues without relying on salon appointments. This gives you more control over the maintenance and upkeep of your extensions.
- Confidence boost: Successfully self-applying microbead hair extensions can boost your confidence and self-esteem. When you achieve the desired look on your own, it can provide a sense of accomplishment and satisfaction. You can feel proud of your ability to transform your hair and enhance your overall appearance.
- Empowerment and independence: Self-applying microbead hair extensions can be an empowering experience. It allows you to take control of your own hair journey and have full autonomy over the outcome. By learning and mastering the application process, you gain a sense of independence and self-sufficiency in managing your hair extensions.
Remember, self-application of microbead hair extensions requires practice, patience, knowledge of the proper techniques, skills and confidence to achieve optimal results. It’s crucial to thoroughly research and educate yourself before attempting the process to ensure the best results. Therefore, self-applying microbead hair extensions may not be suitable for everyone.If you are new to hair extensions or you encounter difficulties as well as feel unsure about the process, it’s always advisable to seek guidance from a professional hairstylist who can guide you or provide assistance to ensure a successful outcome.
Cautions of applying it by yourself

Applying microbead hair extensions by yourself can be a challenging task that requires careful attention and proper technique. It is generally recommended to have a professional hairstylist perform the application to ensure the best results. However, if you still choose to apply microbead hair extensions on your own, here are some important notices to consider:
- Educate yourself: Take the time to thoroughly research and understand the process of applying microbead hair extensions. Watch tutorial videos, read guides, and familiarize yourself with the necessary tools and techniques involved.
- Quality extensions: Choose high-quality microbead hair extensions that are specifically designed for self-application. Ensure that the extensions are made from real human hair or high-quality synthetic materials to achieve a natural look.
- Proper tools: Acquire the necessary tools for the application process. This may include microbeads or rings, a loop tool or threading needle, and pliers designed for microbead extensions. Ensure that the tools are clean and in good condition.
- Preparation: Prepare your natural hair by washing and thoroughly drying it before starting the application process. This will help create a clean and stable foundation for the extensions.
- Blending: After all the extensions are applied, blend them with your natural hair by gently combing or brushing through. This will help create a seamless and natural look.
- Placement accuracy: Achieving accurate and consistent placement of the microbeads can be difficult when working on your own hair. It can be challenging to see the back of your head and ensure that each extension is evenly distributed. As a result, some extensions may end up being placed too close together or too far apart, affecting the overall look and balance of the extensions.
- Tension and tightness: Achieving the right tension and tightness of the microbeads can be tricky. If the microbeads are too loose, the extensions may slip or fall out easily. On the other hand, if they are too tight, it can cause discomfort and put unnecessary strain on your natural hair, potentially leading to breakage. Therefore, avoid applying excessive force or pulling on your natural hair, as this can cause serious damage to your hair strength. Take your time and work slowly and methodically.
- Proper sectioning: Dividing your natural hair into small sections, manageable sections is crucial for an even and seamless application. However, it can be challenging to section your hair evenly, especially when working on the back of your head. Uneven sections can result in uneven distribution of the extensions, leading to an unnatural appearance.
- Limited view and accessibility: It can be difficult to have a clear view and access to all areas of your head, especially the back and sides. This limited visibility can make it challenging to properly place and secure the microbeads, increasing the risk of uneven or improper attachment.
- Time and patience: Applying microbead hair extensions can be a time-consuming process, especially if you are doing it for the first time by yourself. It requires patience and attention to detail, as rushing through the process can result in suboptimal results. It’s important to set aside enough time, practice patience and be prepared for the potential challenges you may face along the way. Take breaks when needed throughout the process might be an effective tip to ensure the best results.
- Maintenance and styling: Once the extensions are applied, maintaining and styling them can also pose difficulties. It can be challenging to properly care for the extensions, including washing, brushing, and styling, without causing damage or tangling. Additionally, certain hairstyles and heat styling tools may as well as excessive tension or pulling on the extensions need to be avoided to prevent damage to both your hair and the microbead extensions.
It’s important to remember that self-application of microbead hair extensions may not yield the same level of precision and quality as when done by a professional hairstylist. If you encounter significant difficulties or are unsure about the process, it’s highly recommended to seek the assistance of a professional to ensure the best results and minimize any potential risks or complications.