
Over time, dyed hair tends to show its true colors, with black roots becoming visible and compromising the overall perfection of the hair. This common issue can be disheartening, but fear not, as there are various ways to tackle it effectively. How can this issue be addressed? Let’s explore the following article together with Nicehairvietnam to find out.
What does ‘black roots’ mean?
“Black roots” refers to the natural color of hair that grows out from the scalp. When someone dyes their hair a different color, such as blonde, brown, or any other shade, the new growth that emerges from the roots will have the person’s natural, original hair color, which is typically black or dark brown. These black roots can create a noticeable contrast with the dyed hair, especially as the hair grows longer, and may require specific methods to address and blend with the rest of the colored hair.

As the days go by, dyed hair undergoes a transformative process where the elongated strands become increasingly vulnerable to revealing contrasting black roots or sprouting new hair strands, resulting in a distinct two toned appearance. To maintain a seamless and harmonious look, it becomes imperative to employ clever techniques that effectively camouflage these black roots. Discover below a range of strategies that can be utilized to expertly address this situation:
Methods to deal with newly grown black roots on dyed hair
Using dry shampoo
What is dry shampoo? Dry shampoo is a type of hair product that comes in a powdered or aerosol form and is used to refresh and cleanse the hair without need for water. It is designed to absorb excess oil and grease from the scalp and hair roots, providing a cleaner and fresher appearance. Dry shampoo is typically applied to the hair, focusing on the roots and then brushed or massaged in to distribute the product and remove any residue. It is a convenient option for those who want to extend the time between traditional hair washes or need a quick solution to refresh their hair on the go.
Experiencing sticky or greasy hair not only affects its overall texture but also exacerbates the visibility of black roots, leading to a less desirable look. To counteract this, incorporating use of a quality dry shampoo can prove to be a game changer. By utilizing dry shampoo, you can effectively tackle the issue of newly grown black roots. Dry shampoo works by absorbing excess oil and revitalizing the hair, providing a refreshed and cleaner appearance. When applied correctly, it helps to guide the newly emerged hair strands in the desired direction, preventing them from becoming tangled and unruly. This significantly aids in managing and styling your hair more easily.
One crucial aspect to consider when using dry shampoo is application technique. While spraying, be mindful to focus on the crown area and the roots, as these are the regions where black roots are most noticeable. Gently massage the dry shampoo into the roots, allowing it to absorb the excess oil and refresh the hair. This targeted approach helps to minimize the appearance of black strands and ensures a more polished look.
By using dry shampoo, you not only maintain a cleaner and fresher hair texture but also create a foundation that allows for better hairstyling. With the elimination of excess oil and the guidance provided to the newly grown strands, your hair becomes more manageable, making it easier to achieve the desired style. As a result, the overall appearance of your hair is enhanced, and the exposure of black roots is reduced.
Remember to choose a high quality dry shampoo that suits your hair type and color. Additionally, it’s essential to follow the instructions provided by the manufacturer to ensure optimal results. By incorporating dry shampoo into your hair care routine, you can effectively address the issue of black roots, giving your hair a rejuvenated look and minimizing their visibility.
Asymmetrical parting for hair
Asymmetrical parting for the hair is a styling technique that involves creating a deliberate imbalance in the placement of the hair part. Instead of parting the hair straight down the middle or in a traditional centered manner, an asymmetrical parting adds a touch of uniqueness and visual interest to the hairstyle.
To achieve an asymmetrical parting, start by combing the hair to remove any knots or tangles. Then, using a comb or your fingers, create a diagonal parting from one side of the head to the other, slightly off center. This off center placement can be positioned towards the left or right, depending on your preference and the desired look. When styling your hair with an asymmetrical parting, you can further enhance the look by incorporating other techniques such as curls, waves, braids, or updos. Experiment with different styling options to find the perfect balance between the asymmetrical parting and the overall hairstyle.
One of the significant advantages of the asymmetrical parting technique is its ability to conceal newly grown black roots. By intentionally shifting the hair part to a non traditional position, you can strategically divert attention away from the area where black roots may be more visible. This clever technique helps to minimize the contrast between the dyed hair and the natural hair growth, creating a more seamless and cohesive appearance.
In addition to the aesthetic benefits, an asymmetrical parting can also add volume and dimension to your hairstyle. By shifting the part to one side, you create a natural lift and movement in the hair, making it appear fuller and more dynamic. This added volume further contributes to concealing the black roots and maintaining an overall polished look.

Zigzag parting for hair
In addition to the asymmetrical parting technique, another method that can effectively conceal black roots is the zigzag parting. This unique parting style not only adds a touch of creativity to your hairstyle but also serves as a strategic way to disguise any emerging black roots. By opting for a zigzag parting, you can create the illusion of thicker hair, which in turn minimizes the visibility of the contrasting colors.
The beauty of zigzag parting lies in its ability to add volume and texture to your hair. By alternating the direction of the part in a zigzag pattern, you create a sense of depth and dimension. This added fullness helps to obscure the black roots, making them less conspicuous. The irregularity of the parting lines disrupts the visual continuity and draws attention away from any regrowth. To enhance the effectiveness of the zigzag parting in concealing black roots, you can further amplify the illusion of thicker hair by incorporating styling techniques such as adding volume at the roots or using texturizing products. These additional steps work synergistically with the zigzag parting, providing a more comprehensive solution for camouflaging any regrowth.
Zigzag parting technique can have a subtle face lifting effect. By strategically placing the parting lines, you can enhance your facial features and create a more youthful appearance. The angles and shifts in the parting can accentuate the cheekbones, adding a natural lift to your face. This additional benefit not only aids in concealing black roots but also contributes to an overall rejuvenated and flattering look.
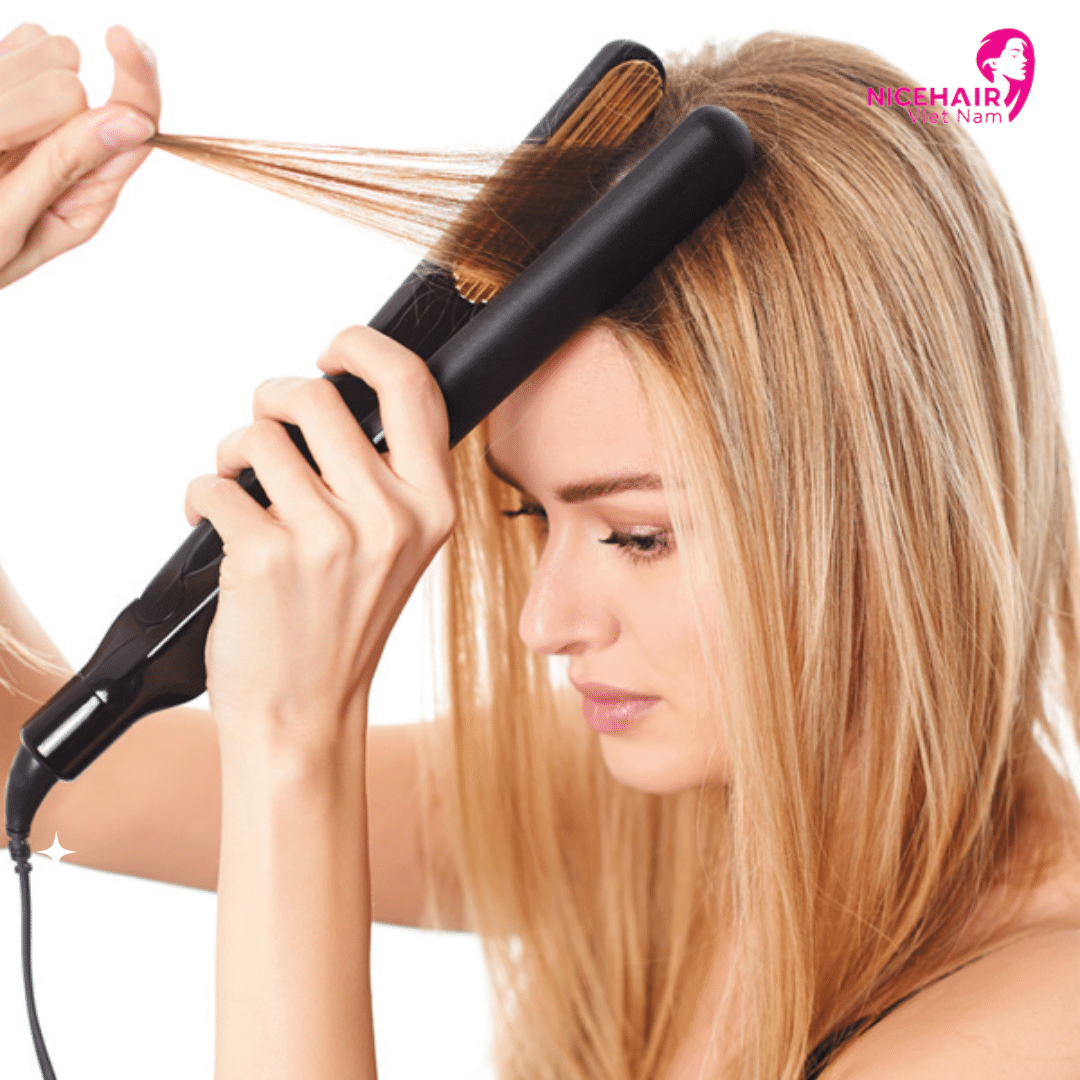
Using a hair straightener
Using a hair straightener is an excellent technique for concealing your black roots. Start by applying a heat protectant spray or serum to shield your hair from the potential damage caused by the high temperatures. Divide your hair into smaller sections, ensuring that each section is adequately heated and straightened. Take your time to glide the straightener smoothly along each section, maintaining a consistent pressure and temperature to achieve the desired sleekness and uniformity.
The heat from the hair straightener helps to temporarily smooth out the texture of your hair, making it appear more uniform and cohesive. By applying the straightener from the root to the tip, you can create a seamless blend between your dyed hair and any newly grown black roots. This technique reduces the stark contrast between the two hair colors, making the regrowth less noticeable and allowing for a more harmonious overall look.
It’s worth mentioning that while using a hair straightener is an effective method for hiding black roots, it is a temporary solution. Regular touch-ups and maintenance will still be necessary to manage the regrowth and maintain the desired look. It’s recommended to consult with a professional hairstylist for expert advice on the frequency and technique of using a hair straightener to ensure optimal results while minimizing damage.
Using a hair curler
Using a hair curler is a fantastic way to unleash your creativity and transform your hair into stunning, customized curls. With a hair curler, you have the power to create versatile curl patterns that range from tight coils to loose waves, adding dimension, volume, and texture to your locks. This magical styling tool effortlessly gives your hair a whimsical, bouncy, and luscious appearance, as if you’ve stepped out of a fairytale.
One of the advantages of using a hair curler is its ability to effectively camouflage any emerging black roots. As you curl your hair, the focus shifts to the beautifully formed curls, diverting attention away from the root area. This clever technique ensures that any regrowth is seamlessly blended into the overall hairstyle, creating a cohesive and eye-catching look. By highlighting the curly sections of your hair, you draw the gaze of others to the mesmerizing texture and movement, allowing your face to take center stage.
To achieve the best results, it’s essential to prepare your hair before curling. Start by applying a heat protectant spray or serum to shield your strands from the heat and minimize potential damage. Divide your hair into sections, ensuring that each section is properly heated and curled. Wrap the hair around the curling wand or clamp, holding it for a few seconds before releasing to set the curl. Repeat this process throughout your hair, working from the bottom layers to the top, until you’ve achieved the desired curl pattern.
Using a teasing comb to create natural volume and texture
After you have finished curling your hair, take a moment to refine and perfect your hairstyle. To achieve this, reach for a comb and gently comb through the curls. This step helps to reshape the curls and create a more cohesive and polished look. Next, grab your trusty hairdryer and use it strategically to enhance the overall appearance of your hair. By directing the airflow and using a round brush, you can create added volume and bounce to your locks. The heat from the hairdryer helps to set the curls and gives them a more defined and luscious appearance.
One of the added benefits of using comb is its ability to camouflage any newly grown black roots. As you style your hair, the focused airflow and movement of the hair help to blend and disguise any contrasting root color, minimizing their visibility. This results in a seamless and harmonious transition between the different shades of your hair, creating a more polished and cohesive look.
By taking these additional steps to refine your hairstyle after curling, you can achieve a stunning and flawless result. Your hair will appear more voluminous, bouncy and well styled while any concerns about black roots will be minimized. This attention to detail ensures that your overall look is refined and beautiful, leaving you feeling confident and ready to conquer the day.
Remember, practice makes perfect when it comes to using a comb and hairdryer to perfect your post curling routine. Experiment with different techniques and find what works best for your hair type and desired style. With time, you’ll become a pro at creating effortlessly glamorous hairstyles that showcase your personality and individuality.
How to dye black roots at home like a salon professional
A soft, trendy hair color is always the choice of modern women. However, no matter how beautiful the dyed hair is, it cannot prevent the continuous growth of black roots, resulting in unsightly visible regrowth. This is undoubtedly a nightmare for every girl, as no one wants their ‘hairline’ to look aesthetically unpleasing, right? This is when you need to turn to a salon immediately to dye your roots. However, not everyone has the time or the desire to visit a hair salon regularly just to touch up their root color. That’s why in this article, Nicehairvietnam will share with you some techniques to dye your black roots at home, achieving salon like results.
When should you dye your black roots again?
When it comes to dealing with black roots, timing is crucial. While the contrast between black hair and dyed hair can be quite apparent, it doesn’t mean you should rush to touch up your roots as soon as you notice the emergence of new black growth.
A general guideline is to wait for about 4 – 8 weeks before considering a root touch up. This timeframe allows the black roots to grow approximately 3 – 6cm, providing an optimal length for the touch up process. By waiting, you also have the advantage of leaving a small section, around 0.5cm, untouched at the hair roots. This precautionary measure helps safeguard your scalp from potential irritation caused by frequent exposure to hair dye chemicals.
Attempting to dye your roots at home should be done with caution and consideration of your hair color situation. If you have uniformly dyed hair without any highlights or color variations, you may choose to undertake the task yourself. Make sure to follow the instructions provided with the hair dye kit and perform a patch test to check for any adverse reactions. You should only attempt to dye your roots at home if you’re dyeing the entire hair evenly. Avoid dyeing your roots at home if you have highlights, as improper application can result in uneven hair color. In this case, it’s best to visit a professional salon where a hair stylist can properly blend the color for your highlights.
It’s also important to note that if you have red pimples or any existing skin damage on your scalp, neck or face, it’s best to postpone hair dyeing until these issues are resolved. Certain hair dyes with high levels of color developer can cause stinging and burning sensations when applied to damaged or irritated skin. Therefore, it’s advisable to minimize scratching or vigorously rubbing the scalp before the hair dyeing process.
To prepare for dyeing your black roots, it’s recommended to refrain from washing your hair for one day (or 2 – 3 days for individuals with dry hair). This allows the natural oils on your scalp to create a protective barrier that helps reduce the risk of allergic reactions. If your hair is excessively dirty, you can lightly rinse it and gently massage the scalp and roots to avoid any potential irritation.
Preparing hair dye tools
Before learning how to dye black roots at home, you need to prepare the following hair dyeing tools:
- Hair dye: Choose a hair dye box that closely matches your current hair color.
- Rubber gloves: These are essential tools to protect your hands. You can purchase rubber gloves from a pharmacy or hair supply stores. If nylon gloves are already included in the hair dye box, you don’t need to buy additional gloves.
- Duckbill clips: These clips are used to section off and secure small sections of hair while applying the dye.
- An old cape or a towel: Use an old plastic cape or a towel to protect your clothing from the hair dye.
- A small dye brush: Use a small dye brush to apply the hair dye onto your hair.
- A tube of Vaseline or moisturizing balm: Use Vaseline or a moisturizing balm to protect your skin from getting stained.

How to mix hair dye for root touch up at home
Regardless of the hair dye brand, it is always necessary to mix hair dye with a developer. The developer, usually in a white and more liquid form, contains acid and is regulated with varying percentages depending on your hair type. Since the roots of the hair are typically new and consist of weaker strands, it is important to choose the appropriate developer.
The mixing ratio of the dye also depends on the current color of your hair. However, there is a general formula to follow if you are using a permanent hair color. The components should be mixed in equal parts or at a ratio of 1:1. If you have purchased a pre mixed hair dye, it is advisable to follow the instructions provided on the packaging. Before applying the dye, make sure to perform a strand test to ensure that the two hair tones do not differ significantly. When it comes to mixing hair dye for a root touch up at home, there are a few important considerations to keep in mind. One crucial element is the developer, which is responsible for activating the hair dye and facilitating the color process. The developer is typically a liquid solution that contains hydrogen peroxide. It comes in various volumes such as 10, 20, 30 or 40, which indicate the strength or intensity of the developer.
The choice of developer volume depends on several factors, including the desired result, the condition of your hair, and the natural color of your roots. If your hair is already porous or damaged, it’s generally advisable to use a lower volume developer to minimize further damage. On the other hand, if you’re looking for a more dramatic color change or your hair is in good condition, a higher volume developer can be used.
To mix the hair dye and developer, follow the instructions provided with the hair dye product. In most cases, you will need to squeeze the desired amount of hair dye into a mixing bowl or applicator bottle and then add the corresponding volume of developer. Use a color brush or gloved hands to thoroughly mix the two components until they form a smooth and consistent mixture. It’s important to mix them evenly to ensure that the color is distributed evenly throughout your hair.
Before applying the mixture to your roots, it’s recommended to perform a patch test to check for any adverse reactions or allergies. Apply a small amount of the mixed dye to a small section of your skin, preferably behind your ear or on your inner arm and leave it on for the recommended amount of time. If you experience any itching, redness or irritation, it’s best to refrain from using the dye and consult a professional hairstylist or dermatologist.
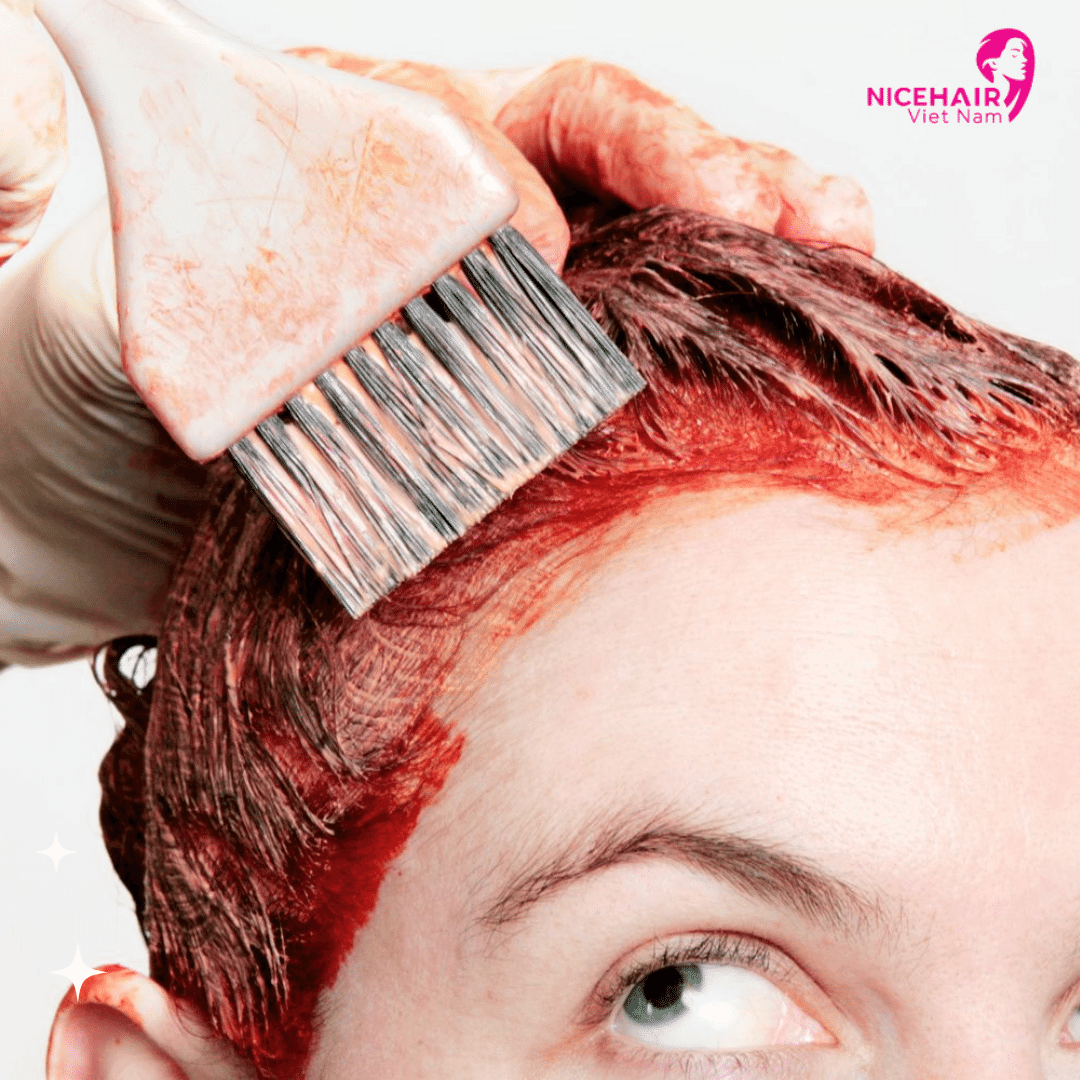
How to dye black roots at home
Dyeing hair may seem simple, but without a clear understanding of the pre, during, and post dyeing process, you can potentially damage your hair. Follow the two steps below for dyeing and touching up black roots to achieve even beautiful and long lasting hair color.
- Step 1: Put on gloves and wrap a towel around your neck. Wear a disposable cape.
- Step 2: Divide the hair into four sections using a comb and secure each section with large clips. Then, apply a layer of petroleum jelly or moisturizing balm along the hairline and forehead to protect the scalp and prevent the dye from staining the skin.
- Step 3: Proceed with the process of dyeing black roots. Use a small dye brush to apply the prepared hair dye. To ensure that no hair strands are missed, further divide each large section of hair into smaller 1cm subsections and apply the hair dye evenly. Apply the dye only to the desired areas that require touch up. It’s important to avoid applying the dye directly onto the scalp to prevent any potential harm to the skin. Brush the hair quickly and evenly, ensuring that the dye does not spread onto other hair sections. This will result in a near perfect salon like finish. For the hair at the back of the neck, which can be challenging to reach on your own, it’s advisable to seek assistance from a family member or someone else.
- Step 4: Set a timer according to the instructions provided on the product and avoid leaving the dye on for too long. The duration of the processing time varies depending on the percentage of the developer in the hair dye. Typically, you may start to see the hair lifting in tone gradually after around 15 minutes. The usual processing time for dyeing black roots is approximately 25 minutes.
- Step 5: When the timer goes off, continue combing the color from the roots down to the end of the newly dyed section to ensure an even color distribution. Afterward, leave it on for an additional 5 – 7 minutes.
- Step 6: After the processing time is complete, thoroughly rinse your hair with a showerhead. It is recommended to use warm water to remove the hair dye. Rinse until the water runs clear and there is no more color coming out. Then, gently shampoo your hair using a shampoo and conditioner specifically designed for color-treated hair, and rinse your hair thoroughly with water.
- Step 7: Proceed to blow dry and style your hair as usual. The key to a successful root touch-up is achieving even and beautiful color on the roots without them appearing lighter than the rest of the hair.
How to care for hair with balck roots?
To switch up your style, many people turn to hair dyeing methods. However, hair dye process can leave your hair dry and damaged. Below are several ways to help you improve the condition of your damaged dyed hair.
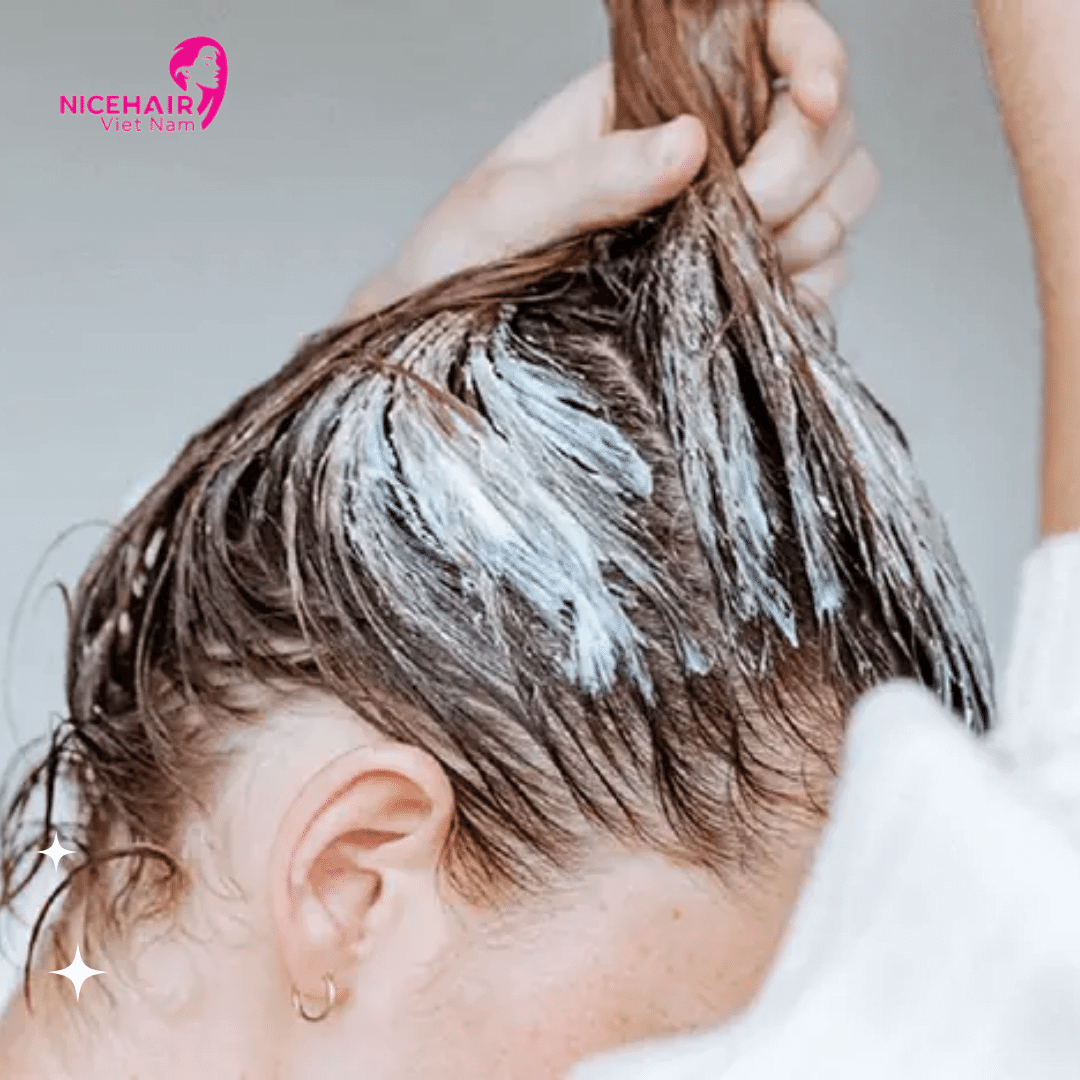
Using hair conditioning cream
Dyed hair often becomes dry and brittle due to the lack of moisture. To help restore your hair, it is important to replenish moisture. One way to do this is by using hair conditioning creams that contain natural ingredients such as aloe vera, coconut oil, grapefruit essential oil and more. Grapefruit essential oil is often included in hair conditioning creams for its refreshing scent and its ability to stimulate the scalp and promote hair health. It also contains antioxidants that help protect the hair from environmental damage. One beneficial ingredient, aloe vera, is known for its hydrating properties. It helps to restore moisture balance, soothe the scalp, and promote healthy hair growth. Coconut oil is another popular ingredient that deeply moisturizes the hair, reduces protein loss, and adds shine and softness.
Hair conditioning creams are specifically designed to provide deep hydration and nourishment to dry and damaged hair. These creams work by coating the hair shaft, sealing in moisture, and improving the overall texture and appearance of the hair.
Using egg and olive oil hair mask
To improve the condition of your hair, you can try using a nourishing hair mask made from eggs and olive oil. This natural hair treatment can help restore moisture, promote shine and leave your hair soft and smooth.
To prepare the mask, start by whisking 5 eggs in a bowl until they are well beaten. Then, add 3 tablespoons of olive oil to the beaten eggs and mix them together thoroughly. You can adjust the amount of olive oil based on the length and thickness of your hair.
Once the mask is ready, apply it generously to your hair, making sure to cover the entire length from the roots to the ends. Massage the mixture into your scalp to stimulate blood circulation and encourage hair growth. After applying the mask, cover your hair with a shower cap or a towel to create a warm and humid environment, which helps the nutrients penetrate the hair shaft. Allow the mask to sit on your hair for approximately 30 minutes to allow the ingredients to work their magic. During this time, the eggs and olive oil will deeply nourish your hair, providing essential proteins and vitamins. The olive oil helps moisturize and condition the hair, while the eggs contribute to its strength and shine.
After the designated time has passed, rinse your hair thoroughly with lukewarm water. Make sure to remove all traces of the mask to prevent any residue from weighing down your hair. You can follow up with a gentle shampoo to cleanse your scalp and hair.
For optimal results, it is recommended to incorporate this egg and olive oil hair mask into your hair care routine on a regular basis. Consistency is key in achieving soft, smooth and salon worthy hair. Over time, you should notice an improvement in the overall texture and appearance of your hair. Remember to perform a patch test before applying the mask to your entire hair to ensure that you’re not allergic to any of the ingredients. If you experience any discomfort or irritation, discontinue use immediately.
Using avocado and honey hair mask
Another effective hair mask for improving the condition of your hair is avocado and honey mask. This natural treatment can help nourish and moisturize your hair, leaving it soft, shiny, and more manageable.
To prepare the mask, start by scooping out the flesh of a ripe avocado and placing it in a bowl. Mash the avocado until it becomes a smooth and creamy consistency. Then, add 2 tablespoons of honey and 1 tablespoon of olive oil to the mashed avocado. Mix the ingredients thoroughly to create a uniform paste. Once the mask is ready, apply it generously to your hair, focusing on the mid-lengths and ends. Avocado is rich in essential fatty acids, vitamins, and minerals that provide deep hydration and nourishment to the hair strands. Honey is a natural humectant, attracting and sealing in moisture, while olive oil helps to condition and add shine.
After applying the mask, gently massage it into your scalp to stimulate blood circulation and promote hair growth. Then, cover your hair with a shower cap or wrap it in a towel to create a warm and humid environment, allowing the mask to penetrate deeply into the hair shafts. Leave the mask on for approximately 20 minutes to allow the nutrients to work their magic. During this time, the avocado, honey, and olive oil will deeply moisturize and repair your hair, improving its texture and overall health.
After the designated time has passed, rinse your hair thoroughly with cold water. Cold water helps to seal the hair cuticles, locking in the moisture and leaving your hair smooth and shiny. You can follow up with a gentle shampoo to remove any remaining residue and ensure your hair is clean and fresh.
It is recommended to incorporate this avocado and honey hair mask into your hair care routine once or twice a week, depending on the condition of your hair. Consistent use will help restore moisture, improve the elasticity of your hair, and enhance its natural shine.
Using coconut oil and yogurt hair mask
Another effective hair mask that you can try is coconut oil and yogurt mask. This natural treatment is known for its moisturizing and nourishing properties, which can help revive and rejuvenate your hair.
To prepare the mask, mix together 4 tablespoons of coconut milk, 2 tablespoons of coconut oil, and 12 tablespoons of yogurt. You can use plain yogurt or Greek yogurt for this recipe. Combine the ingredients well to create a smooth and creamy mixture. Once the mixture is ready, transfer it to a saucepan and heat it gently until it becomes warm and melted. Be careful not to overheat the mixture as it may lose its beneficial properties.
After heating, allow the mixture to cool down slightly before applying it to your hair. Make sure your hair is clean and damp before applying the mask. Start by sectioning your hair and applying the mask evenly from the roots to the ends, ensuring that all strands are coated.
Once the mask is applied, gently massage it into your scalp to stimulate blood circulation and enhance the absorption of nutrients. Then, cover your hair with a shower cap or wrap it in a warm towel to create a conducive environment for the mask to penetrate the hair shafts. Allow the mask to sit on your hair for about 20 minutes, allowing the ingredients to work their magic. This will give enough time for the coconut oil and yogurt to moisturize and nourish your hair, improving its texture and overall health.
After the recommended time has passed, rinse your hair thoroughly with cold water to remove the mask. Cold water helps to seal the hair cuticles, locking in the moisture and leaving your hair looking shiny and smooth.
It is recommended to incorporate this coconut oil and yogurt hair mask into your hair care routine once a week or as needed, depending on the condition of your hair. Consistent use will help restore moisture, repair damage, and promote healthy hair growth.
Aftercare tips for coloring hair at home
To maintain long lasting hair color, it is important to choose hair care products specifically designed for colored hair such as color safe shampoos, conditioners, hair masks, etc.
Frequent washing with hot water and high temperature hair drying can lead to dry, split ends and cause the color to fade quickly. Therefore, it is best to wash your hair with cold water or lukewarm water if the weather is too cold. When blow drying, keep the dryer at least 20cm away from your hair or use the cool air setting. Use of heat styling tools such as flat irons, curling irons, and hot rollers, as excessive heat can fade the color and cause damage to the hair. If heat styling is necessary, apply a heat protectant spray or serum to shield the hair from heat damage.
Dyeing your hair makes it more susceptible to fading and dullness due to the effects of sunlight, saltwater and chlorine. Therefore, it is advisable to protect your hair by wearing a wide-brimmed hat when out in the sun and using a scarf or swim cap when swimming.
Additionally, it is recommended to avoid excessive exposure to direct sunlight, especially during peak hours. UV rays can cause the hair color to fade and lose its vibrancy. Applying a leave in conditioner with UV protection or using hair products specifically formulated to shield against UV rays can help preserve the color.
Regular deep conditioning treatments are also beneficial for maintaining vibrant, healthy looking colored hair. Consider using hair masks or deep conditioning treatments specifically formulated for colored hair to replenish moisture and keep your locks nourished.
Black roots hair suddenly becomes a new trend
It can be said that the weakness of hair color enthusiasts is when their natural black leg hair starts to grow out, as it can make their dyed hair appear less vibrant and even messy in the eyes of others. However, in this new era of openness and unconventional beauty standards, the tide of trends has shifted, turning what used to be considered “imperfections” into new standards and beauty ideals. From freckles to gap teeth to tall foreheads, now even exposed black leg hair in dyed hair can captivate and delight. If your dyed hair is in need of a refresh, why not embrace your lazy side and let your black leg hair grow out? You won’t be disappointed with this new and fascinating transformation!
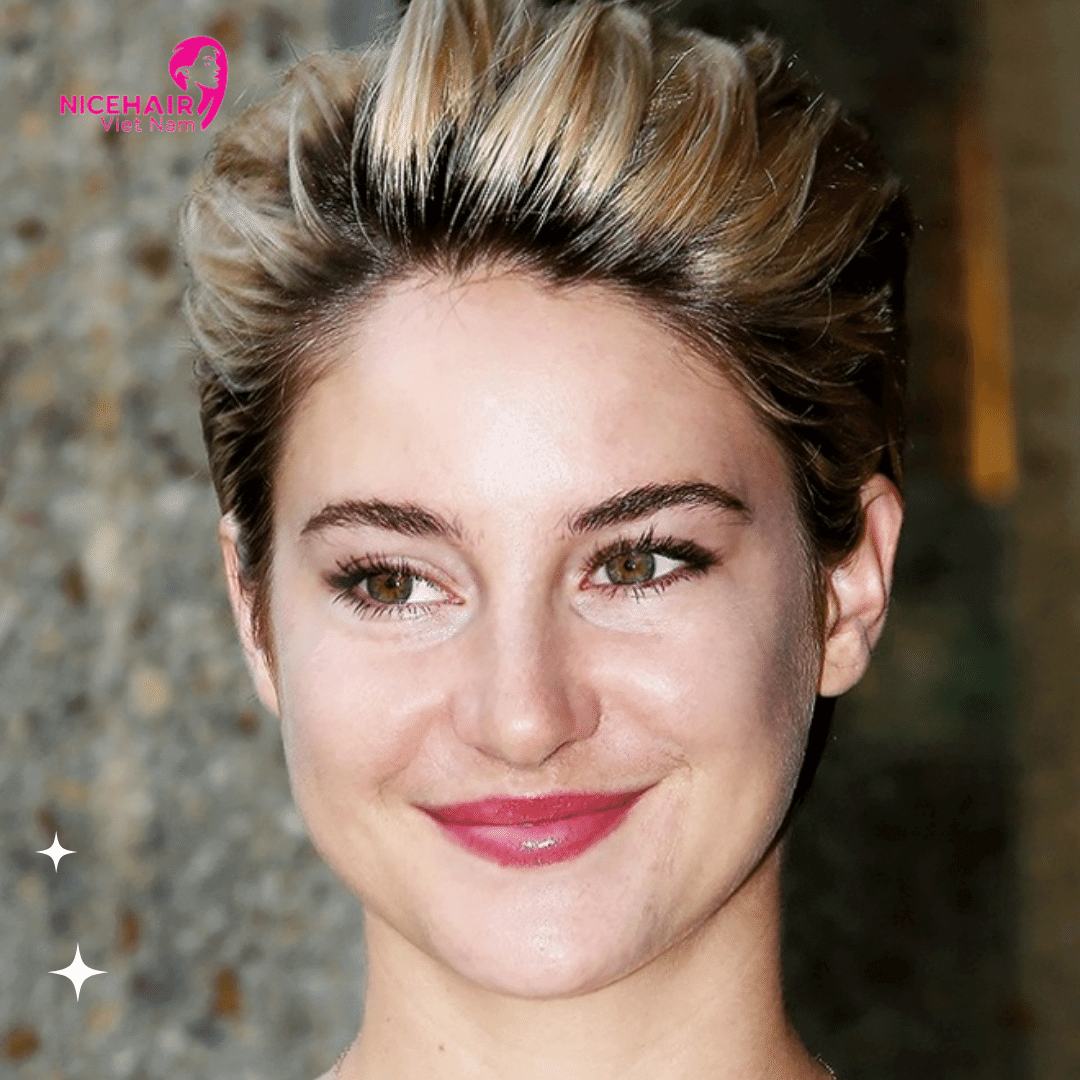
Celebrities who endorse black roots
In recent years, the beauty industry has witnessed a significant shift in hair trends and one particular style that has gained immense popularity is dyed hair with visible black roots. This trend hailed by Glamour Magazine as a game changer, has captured the attention of fashion forward individuals and celebrities alike. What sets this trend apart is its departure from the conventional notion that roots should be perfectly matched to the dyed color. Instead, deliberate display of black roots adds a touch of edginess and a sense of authenticity to the overall look. It challenges the traditional standards of hair aesthetics and celebrates the natural growth process of the hair.

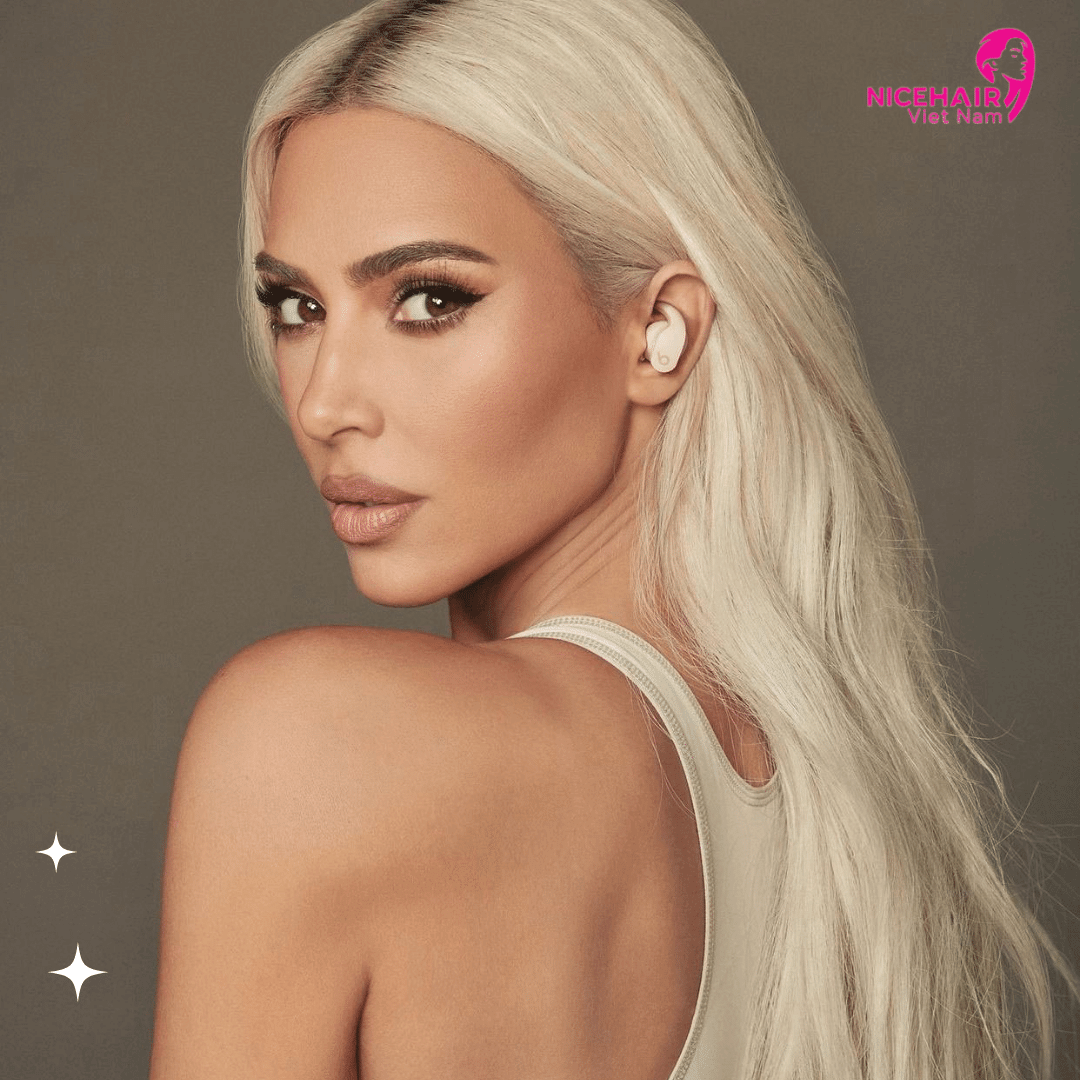
Leading the way in popularizing this trend are renowned celebrities. Kim Kardashian, known for her bold fashion choices, effortlessly showcases the appeal of dyed hair with black roots. Dua Lipa with her unique sense of style, has also embraced this trend, solidifying its status as a must try look.
Hadid sisters, Gigi and Bella renowned for their stunning looks and trendsetting abilities have been spotted flaunting their locks with visible black roots. Their endorsement resonates with fashion enthusiasts worldwide, inspiring them to experiment with their own hair and appreciate the beauty of black roots.
Rihanna – a trailblazer in both music and fashion fearlessly pushes boundaries. With her influential status, she not only embraces the black roots trend but also adds her own unique flair, turning it into a true fashion statement.
Margot Robbie, known for her versatile roles and impeccable style, also joins the ranks of celebrities embracing the beauty of dyed hair with black roots. Her endorsement adds further credibility to this trend, establishing it as a chic and fashionable choice.
The newfound acceptance and appreciation for visible black roots challenge preconceived notions of beauty in hair aesthetics. What was once considered a flaw or sign of neglect is now celebrated as a bold and intentional choice. It exemplifies the evolving nature of beauty standards and the freedom to express oneself through personal style. As this trend gains momentum, more individuals are embracing the beauty of black roots and incorporating it into their hair dyeing routines. It allows for a seamless blend between natural and dyed hair, adding depth and dimension to the overall look.
So, if you’re looking to make a statement with your hair and stay ahead of the fashion curve, don’t hesitate to let your black roots shine. Embrace this exciting and empowering hair trend that celebrates individuality and challenges traditional beauty norms, just like the trendsetters who have already embraced it.
Why is black roots hair trend so popular?
The hairstyle known as “shadow roots” has gained popularity as a dyeing technique that offers a unique twist on the traditional balayage style. Instead of gradually transitioning from light to dark, this trend involves coloring the roots in a dark shade while leaving the rest of the hair in lighter tones. This technique first emerged in 2021 and has since captured the attention of many due to its convenience and easy maintenance. Shadow roots offers a practical solution for those who want to maintain longer hair while still achieving a visually pleasing aesthetic. Rather than waiting for the natural growth of dark roots and dealing with the potential awkward phase, many people opt to dye their hair in the shadow roots style right from the start. By doing so, they can create a seamless and polished look with a smooth transition between the dark roots and lighter strands.
Moreover, treating the hair with the shadow roots technique from the beginning allows for better control over the overall color result. By carefully applying the dark dye to the roots and blending it into the lighter sections, hairstylists can achieve a more natural and harmonious appearance. This method ensures that the contrast between the dark and light shades is well balanced, enhancing the overall dimension and depth of the hairstyle.
In addition to its aesthetic benefits, the shadow roots style offers practical advantages as well. Since the dark roots are intentionally incorporated into the design, it allows for longer periods between touch up appointments. As the hair grows, the shadow roots gradually become more visible, creating a soft and effortless regrowth effect. This low maintenance aspect appeals to individuals who prefer a more relaxed approach to hair upkeep without sacrificing style.
Dealing with newly grown black roots on dyed hair can be a common challenge for many individuals. However, there are several effective ways to manage and maintain the overall appearance of your colored hair. By choosing the right hair care products specifically designed for colored hair, such as shampoos, conditioners, and hair masks, you can help preserve the vibrancy and longevity of your hair color. Additionally, opting for cooler water temperatures when washing your hair and avoiding excessive heat styling can prevent further damage and color fading. If you’re open to embracing a trendy look, the option of leaving the black roots visible can create a unique and fashionable style statement. Many celebrities and influencers have popularized this trend, showcasing the beauty of the contrast between the dark roots and lighter hair.
Embracing and caring for your dyed hair is a journey that requires patience and dedication. With the right approach and a little extra care, you can confidently rock your dyed hair, whether you choose to embrace the natural roots or opt for regular touch ups. So, experiment, have fun, and enjoy the versatility and beauty of your colored locks!